Antjie

Antjie

Tuesday 31 July 2012

Joy Abounding...


by Kerrie O'Hearn Marquart


Every morning I wake with Joy Abounding
To see all the works of God astounding
The bluest sky, the reddest Rose
The Mockingbird, the squirrel's nose!
The flowers asleep in my flower beds
Waiting for Spring to show their heads.

The Bluebird's call, the Robin's wing
The tree buds are fat, it is almost Spring
The Mallards swimming in the lake
They've come again, as for life they mate.

All the wonders of this earth
Were made by God, our life, our worth
And I thank Him now as well I should
For creating this day with all its good!

Combo-Tomato Rice&Curd Rice with Vada

Tomato rice and Curd rice combo will perfectly suit for picnic's, lunch boxes.
It is also very easy to make..along with potato chips or something crispy..it will be fulfilling.

Ingredients for Tomato Rice:
1. Ripe Tomatoes-6
2.Garlic-15 cloves
3.Mustard-1/4 spoon
4.Fenugreek-8 seeds
5.Red chilli-4-5
6.Urad dal-1/2 spoon
7.Chana dal-1/2 spoon
8.Curry leaves-8
9.Corriander leaves-to  garnish
10.Oil-10tsp
11.Salt
12.Chilli powder-1 tsp
13.Turmeric powder-1/4 tsp
Method:
Usually i prepare tomato thokku and mix it with rice instead of pressure cooking the rice with the tomatoes.

Tomato thokku:
arrow_42 First have a kadai and add 10 tsp's of oil and add mustard seeds..after it splutter,add fenugreek,redchilli,urad dal,chana dal. after they are roasted add curry leaves and garlic..roast the garlic.
arrow_42 Now add finely chopped tomatoes. fry them.add salt,turmeric powder and chilli powder to it. fry atleast for 10 minutes till the tomatoes wind up and come..also when oil seperates.
arrow_42 Have the rice spread on a plate and have 2 spoons of oil and spread it and let the rice get cooled. now add the tomato thokku to it and mix well. garnish it with corriander leaves..

it tastes so good..give a try.

Lacy Ruffle Cardigan in all sizes.....

By: Doris J. Chan from Caron Yarn

Create an elegant cardigan for work or play with this intermediate cardigan crochet pattern. This crochet pattern features the V-stitch, an open lace trim and bone rings for cardigan closure.


MATERIALS: Small (Medium, Large, X-Large, 2X-Large)
  • Caron International's Simply Soft Brites (100% acrylic; 6 oz/170 g, 330 yds/302 m): 3 (3, 4, 4, 5) skeins in #9608 Blue Mint 
  • Crochet Hook, size US I-9 (5.5 mm), or size to obtain gauge 
  • Crochet Hook, size US G-6 (4 mm) for buttons only 
  • Split ring markers or scraps of contrasting yarn for markers 
  • 2 plastic bone rings, 3/4”/2 cm in diameter for buttons 
  • Yarn needle 
FINISHED MEASUREMENTS: Small (Medium, Large, X-Large, 2X-Large)
Chest/Bust 36 (40, 44, 48, 52)”/91.5 (101.5, 112, 122, 132) cm

GAUGE
Using I-9 (5.5 mm) hook, 12 Base ch/sc = 4”/10 cm
In V stitch pattern, 4 V's and 6 rows of V's = 4”/10 cm as crocheted.

Note: Fabric will grow slightly in length and skinny out for finished measurements.

SPECIAL TECHNIQUES:
Base Chain/Single Crochet (Base ch/sc)

Note: This technique creates a foundation chain and a row of sc at the same time.

First Stitch: Begin with a slip knot; ch 2, insert hook into second ch from hook, *yo and pull up a loop, yo and draw through one loop (this is the chain), yo and draw through 2 loops (this is the sc).
Next Stitch: Note: The next st is worked under the forward 2 loops of the stem of the previous st (the chain) made when working the st. Insert hook into the bottom of the previous st, under 2 loops, repeat from * of first st.
Repeat this step for number of sts indicated in instructions.
To Add Stitches with Base ch/sc: At end of a row, do not turn; ch 1, insert hook under 2 strands of stem of st just made, yo and draw up a lp, yo and draw through one lp on hook, yo and draw through 2 lps on hook; make additional base ch/sc as needed.
V stitch (V) - (Dc, ch 2, dc) in same st or sp
V stitch in V stitch (V in V) - V in ch-2 space of next V
shell - (2 dc, ch 2, 2 dc) in same st or space

ABBREVIATIONS:
t-ch turning ch
STITCHES USED:
Chain st (ch)
Double crochet (dc)
Single crochet (sc)
Slip stitch (sl st)
V stitch (V)

INSTRUCTIONS:
Sweater is made from the neck down, with increases at four corners to create raglan-type shaping at the arm.
Base ch/sc 33 (33, 33, 33, 37) to measure approx 11 (11, 11, 11, 12)” stretched.
Row 1: Ch 5 (counts as dc, ch 2), dc in 1st sc, [skip next sc, V in next sc] 7 (7, 7, 7, 8) times, skip next sc, Sizes S and M make V in next sc; Sizes L, XL and 2XL make (V, ch 2, V) in next sc for center back increase, [skip next sc, V in next sc] 8 (8, 8, 8, 9) times, turn – 17 (17, 19, 19, 21) ch-2 spaces.
Row 2 (inc): Ch 5, (dc, ch 2, V) in 1st ch-space for corner, V in each of next 3 V's, (V, ch 2, V) in next V for corner, V in each of next 7 (7, 9, 9, 11) ch-2 spaces, (V, ch 2, V) in next V for corner, V in each of next 3 V’s, (V, ch 2, V) in t-ch space for corner, turn – 25 (25, 27, 27, 29) ch-2 spaces.
Mark the ch-2 space at center of each corner, move or wrap markers up as you go.
Separate instructions for sizes follow.

SIZE SMALL:
Small Row 3:
Ch 5, dc in 1st ch-sp, V in each V and corner ch-2 space across, end with dc in t-ch space, ch 2, dc in 3rd ch of t-ch, turn – 25 V's.
Small Row 4 (inc): Ch 5, dc in 1st ch-space, *V in each V to next corner V, (V, ch 2, V) in corner V; rep from * 3 times, V in each V across, end with dc in t-ch space, ch 2, dc in 3rd ch of t-ch, turn – 33 ch-2 spaces.
Small Row 5: Ch 5, V in 1st ch-space, V in each V and corner ch-2 space across, end with V in t-ch space, ch 2, dc in 3rd ch of t-ch, turn – 35 ch-2 spaces.
Small Row 6 (inc): Rep S Row 4 – 43 ch-2 spaces.
Small Row 7: Rep S Row 3.
Small Row 8: Ch 5, V in 1st ch-space, V in each V across, end with V in t-ch space, ch 2, dc in 3rd ch of t-ch, turn – 45 ch-2 spaces.
Small Row 9 (inc): Rep S Row 4 – 53 ch-spaces.
Small Row 10: Rep S Row 3 – 53 V's.

SIZE MEDIUM:
M Row 3 (inc):
Ch 5, dc in 1st ch-space, *(V, ch 2, V) in next corner ch-2 space, V in each V to next corner; rep from * 2 times, (V, ch 2, V) in last corner ch-2 space, end with dc in t-ch space, ch 2, dc in 3rd ch of t-ch, turn – 33 ch-2 spaces.
Medium Row 4: Same as S Row 3 – 33 V's.
Medium Row 5 (inc): Ch 5, V in 1st ch-space, *V in next V to next corner V, (V, ch 2, V) in corner V; rep from * 3 times, V in next V to end, end with V in t-ch space, ch 2, dc in 3rd ch of t-ch, turn – 43 ch-2 spaces.
Medium Row 6: Same as S Row 3 – 43 V's.
Medium Row 7: Ch 5, dc in 1st ch-space, V in each V across, end with dc in t-ch space, ch 2, dc in 3rd ch of t-ch, turn.
Medium Row 8 (inc): Rep M Row 5 – 53 ch-spaces.
Medium Row 9: Same as S Row 3 – 53 V's.
Medium Row 10 (inc): Same as S Row 4 – 61 ch-spaces.
Medium Row 11: Same as S Row 3 – 61 V's.

SIZES L, XL and 2 XL
L/XL/2XL Row 3-9:
Same as M Rows 3-9, with 2 (2, 4) additional V's in each row – 55 (55, 57) V's.
L/XL/2XL Row 10: Ch 5, dc in 1st ch-space, V in each V across, end with dc in t-ch space, ch 2, dc in 3rd ch of t-ch, turn.
L/XL/2XL Row 11: Same as M Row 5 – 65 (65, 67) ch-spaces.
L/XL/2XL Row 12: Same as S Row 3 – 65 (65, 67) V's.

SIZE 2XL ONLY
2XL Row 13:
Ch 5, V in 1st ch-space, V in each V across, end with V in t-ch space, ch 2, dc in 3rd ch of t-ch, turn – 69 V's.

ALL SIZES
53 (61, 65, 65, 69) V's. Join fronts and back with additional sts at underarms, complete neck shaping as follows:
Joining Row: Ch 5, V in 1st ch-space, V in next 5 (6, 7, 7, 8) V's to next corner V, *V in
corner V, Base ch/sc 5 (5, 5, 11, 11) for underarm, skip 11 (13, 13, 13, 13) V's of armhole, V in next corner V*, V in next 15 (17, 19, 19, 21) V's to next corner V, rep from * to * for other underarm, V in next 5 (6, 7, 7, 8) V's, V in t-ch space, ch 2, dc in 3rd ch of t-ch, turn.

BODY
Fill in V stitch patt across underarm sts as follows:
Row 1:
Ch 3, dc in 1st ch-space, V in next 7 (8, 9, 9, 10) V's to underarm, *[skip next 2 sc, V in next sc] 1 (1, 1, 3, 3) times, skip rem 2 sc of underarm*, V in next 17 (19, 21, 21, 23) V's to underarm, rep from * to *, V in each of next 7 (8, 9, 9, 10) V's, end with dc in t-ch space, dc in 3rd ch of t-ch, turn – 35 (39, 43, 47, 51) V's plus edge sts.
Row 2: Ch 3, dc in 1st dc, V in each V across, 2 dc in top of t-ch, turn.
Rep Row 2 for 3 (3, 4, 4, 4) more times, or to desired length before bolero front shaping.

Note: If you add rows here, do it in multiples of three rows, to maintain correct multiples for lace trim.

Shape bolero fronts as follows;
Cut-away Row 1:
Ch 4, V in each of next 35 (39, 43, 47, 51) V's, tr in top of t-ch, turn.
Cut-away Row 2: Sl st in next dc and ch-space of V, ch 4, V in each of next 33 (37, 41, 45, 49) V's, tr in last V, turn.
Cut-away Row 3: Sl st in next dc and ch-space of V, ch 4, V in next 31 (35, 39, 43, 47) V's, tr in last V, do not turn.

EDGING
Rotate and work sc around front and neck edges as follows:
Rnd 1:
Ch 1, 4 sc in each of next 2 tr row edges, 4 (5, 4, 4, 3) sc in next tr row edge, 2 sc in each of next 16 (17, 19, 19, 20) dc row edges, sc in each of next 33 (33, 33, 33, 37) base ch of neck, 2 sc in each of next 16 (17, 19, 19, 20) dc row edges, 4 (5, 4, 4, 3) sc in next tr row edge, 4 sc in each of next 2 tr row edges, sl st in beg dc of bottom – 121 (127, 133, 133, 139) sc (a multiple of 6, plus 1.) Fasten off.

LACE TRIM
Work trim around entire outer edge of jacket in joined rounds, turning at the end of each rnd. Turn, join yarn with sl st in ch-space of V at lower edge, center of back. Make a rnd of V's, having a multiple of 2 V's around as follows:
Rnd 1: Ch 3, V in each of next 15 (17, 19, 21, 23) V's, V in 1st sc, [skip next 2 sc, V in next sc] 40 (42, 44, 46) times, V in each of next 15 (17, 19, 21, 23) V's, dc in same space as beg, ch 1, sc in top of beg ch, turn – 72 (78, 84, 88, 94) V's.
Rnd 2: Ch 3, dc in same space, *ch 2, sc in ch-space of next V, ch 2, shell in ch-space of next V; rep from * 35 (38, 41, 43, 46) times, except omit last shell, instead end with 2 dc in same space as beg, ch 1, sc in top of beg ch, turn – 36 (39, 42, 44, 47) reps.
Rnd 3: Ch 3, dc in same space, *ch 3, sc in next ch-2 space, sc in next sc, sc in next ch-2 space, ch 3, shell in ch-space of next shell; rep from * around except omit last shell, instead end with 2 dc in same space as beg, ch 1, sc in top of beg ch, turn.
Rnd 4: Ch 3, dc in same space, *ch 3, sc in next ch-3 space, sc in next 3 sc, sc in next ch-3 space, ch 3, shell in ch-space of next shell; rep from * around except omit last shell, instead end with 2 dc in same space as beg, ch 1, sc in top of beg ch, turn.
Rnd 5: Ch 3, dc in same space, *ch 1, dc in next ch-3 space, ch 5, dc in next ch-3 space, ch 1, shell in ch-space of next shell; rep from * around except omit last shell, instead end with 2 dc in same space as beg, ch 1, sc in top of beg ch, turn.
Rnd 6: Ch 3, dc in same space, *ch 3, sc in next ch-1 space, 7 hdc in next ch-5 space, sc in next ch-1 space, ch 3, shell in ch-space of next shell; rep from * around except omit last shell, instead end with 2 dc in same space as beg, ch 1, sc in top of beg ch, turn.
Rnd 7: Ch 2, dc2tog in same space for beg cluster, ch 3, sl st in top of cluster for picot, *ch 4, sc in next ch-3 space, ch 4, skip next 3 hdc, sc in next hdc, ch 3, sl st in top of sc for picot, ch 4, sc in next ch-3 space, ch 4, dc3tog in ch-space of next shell for cluster, ch 3, sl st in top of cluster for picot; rep from * around except omit last cluster and picot, instead sl st in top of beg cluster. Fasten off.

SLEEVES
At underarm, working in opposite direction as sts of armhole, join with sl st in 3rd (3rd, 3rd, 6th, 6th) base ch at center of underarm ch.

SIZES S, M and L Rnd 1:
Ch 3, skip next 2 ch of underarm, V in next dc row edge, V in next 11 (13, 13) V's of armhole, V in next dc row edge before underarm ch, skip next 2 ch, dc in same ch as beg, ch 1, sc in top of beg ch, turn – 14 (16, 16) V's.

SIZES XL and 2XL Rnd 1: Ch 3, skip next 2 ch of underarm, V in next ch, skip next 2 ch, V in next dc row edge, V in next 13 V's of armhole, V in next dc row edge before underarm ch, skip next 2 ch, V in next ch, skip next 2 ch, dc in same ch as beg, ch 1, sc in top of beg ch, turn – 18 V’s.

ALL SIZES Rnd 2: Ch 3, V in next 13 (15, 15, 17, 17) V's, dc in same space as beg, ch 1, sc in top of beg ch, turn – 14 (16, 16, 18, 18) V's.

Taper sleeve as follows:
Rnd 3 (dec):
Ch 3, dc in next V, V in next 12 (14, 14, 16, 16) V's, dc in same space as beg, ch 1, sc in top of beg ch, turn.
Rnd 4: Ch 3, V in next 12 (14, 14, 16, 16) V's, skip next 2 dc, dc in same space as beg, ch 1, sc in top of beg ch, turn – 13 (15, 15, 17, 17) V's.
Rnd 5: Ch 3, V in each V, end with dc in same space as beg, ch 1, sc in top of beg ch, turn.
Rnd 6 (dec): Ch 3, dc in next V, V in next 11 (13, 13, 15, 15) V's, dc in same space as beg, ch 1, sc in top of beg ch, turn.
Rnd 7: Ch 3, V in next 11 (13, 13, 15, 15) V's, skip next 2 dc, dc in same space as beg, ch 1, sc in top of beg ch, turn – 12 (14, 14, 16, 16) V's.
Rnd 8: Rep Rnd 5 once more, or to desired sleeve length before lace trim.
Rnd 9-14: Same way as body trim Rnds 2-7 on 6 (7, 7, 8, 8) reps. Fasten off.
Make other sleeve same way. Weave ends, lightly steam block lace trim.

FINISHING
Make a double-button link for front closure. Note: To crochet over a bone ring, make sc by inserting hook in next sc and into center of ring each time.

BUTTON (1”/2.5 cm in diameter, make 2)
Rnd 1 (RS):
Using smaller hook, working firmly, leaving several inches tail, ch 2, 6 sc in 2nd ch from hook, sl st in beg sc, bringing tail to RS of work – 6 sc.
Rnd 2 (RS): Hold a bone ring in back of work, ch 1, 3 sc in each sc, working over bone ring each time, sl st in beg sc. Fasten off, leaving several inches tail – 18 sc.
RS of work is back of button. Thread ending tail on yarn needle, stitch into center of button, knot two tails together tightly.
To connect 2 buttons for double-button link: Using one tail from one button, ch 4, using one tail from second button, sl st back in each ch, knot together 2 tails at back of each button. Fasten off. Weave ends into WS center of each button.
There is no obvious RS or WS of jacket; it’s your choice which side you want to be the “public” side. Fold the collar back, using the rnd of sc as a guide, locate corresponding dc edge row spaces in left and right fronts as buttonholes, position closure as desired.

Feels Like Redemption

Monday 30 July 2012

Baby Girl Sleeper Set


Materials:  Size: 0-3 months
  • Pink sport weight yarn
  • White sport weight yarn
  • "I" hook
  • Special Stitches: Shell=(2DC, ch 1, 2DC).
DRESS: Start with Pink, Ch 40
Row 1. Dc in 3rd ch from hook and in next 3 chs, 3dc (corner made), Dc in next 7 chs, 3dc (corner made),dc in next 11, 3dc (corner made), Dc in next 7, 3dc (corner made), Dc in last 5. Ch 3 turn. (47 dc)
Row 2. Dc in next 5dc, CORNER, dc in next 9, CORNER, dc in next 13, CORNER, dc in next 9, CORNER. dc in last 6 sts. Ch 3, turn (55 sts)
Row 3. Dc in next 6 dc, CORNER, dc in next 11, CORNER, dc in next 15, CORNER, dc in next 11, CORNER, dc in last 7 sts. Ch 3 turn. (63 sts)
Row 4. Dc in next 7, CORNER, dc in next 13, CORNER, dc in next 17, CORNER, dc in next 13, CORNER, dc in last 8 sts. Ch 3, turn. (71 sts)
Row 5. 2dc in base of ch 3, *Sk 1 st, Shell in next. Rep * across to last 2 sts. Sk next st, 2dc in last, Join with sl st to beg ch. Fasten off pink.
Row 6 (making armholes). With white, In same "shell", ch 3, dc in sp, ch 1, 2dc in space (1st shell made). (working shells in ch 1 sp of shells below)Shell in next 5 shls . Sk 8 shls. Shell in next 10 shls. Sk next 8 shls. Shell in last 4 shls. Join to first ch 3. DO NOT TURN. (20 shells)
Row 7-14 (or desired length): Ch 1, sl st into ch1 space of next shell, (Ch3, dc, ch1, 2dc)all in same shell (beg shell made). Shell across. Join to ch 3. At end of last row, fasten off white.
Row 15. With pink, attatch yarn to any sp between any 2 shells with sl st. *5 dc in ch 1 sp of next shell. Sl st in between shells. Rep * around. Sl st in first sl st. Fasten off
Decoration: Add flower below or any small decoration
Ch 4, Join to form ring. *Ch 3, 2 dc, sl st into ring. Rep 5 times. Fasten of leaving 10 in tail and sew to front, center of sleeper.
Edging (slip stitching in ends of rows)
Attatch pink yarn to any st around neck. Sc around rem neck stitchs. At the corner that opens to the back, Ch 18, sl st back down ch (first tie made). Sl st half way down back. Ch 18, Sl st down ch. Sl st down rest of the way. When you get to the opening where you made the first white shell, Do not sl st in the white shell. Only continiue on the other side sl stitching in only pink sts. This closes the back up a little. Sl st up to place opposite of second tie, Place tie, Sl st up to place of first tie, Place tie, sc around rest of neck. Join with sl st to first sc. Fasten off.

Note about butterfly knot: I usually tie the ties in this manner: Take both ties TOGETHER. Grasp them together at the base. Make a loop with them together at the base, and pull ends through. Push knot to base of ties (see picture below). It is sort of a knot that resembles antennas. Works well for me.

DIAPER COVER:
With white, Chain 30

Row 1: Dc in third chain from hook and in each chain to the end. Ch 2, turn
Row 2: Hdc across. Do not ch for beg ch.
Row 3: sk last st made on row before, DO NOT CH, hdc in next stitch and in each stitch across, do not hdc in last stitch. turn.
Row 4-9: repeat row 3. You will be decreasing 2 stitches on each row
Row 10-12: ch 2, hdc in each hdc across, ch 2, turn.
Row 13-20: hdc in base of ch 3(beg st), hdc across, 2 hdc in last stitch.
Work a complete row of HDC then a complete row of DC (like when beg diaper cover). Fasten off white
Finishing: With pink, attatch yarn to middle of either section around top. Hdc around, overlaping edges 3 sts and working over double thickness at edges. Join.
Next row: Ch 2, (Fphdc, bphdc) around. Join.
Last row: Sk 2 sts, *5dc in next (complete shell made), sk 2 sts, sl st in next. Rep around. JOIN. Fasten off
Leg edging: Attach pink to any leg hole. Working from the outside, 26 sc around. Join. Fasten off. Rep for other leg hole.

SHOES
With pink, Ch 8

SOLE:
Rnd 1: 2 dc in 3rd ch from hook, dc in next 4 sts. (3 dc, 3 hdc) in last ch. Working on other side of ch, hdc in next 4 chs. (3 hdc) in last ch. Join with sl st.
Rnd 2: Ch 3, dc in same st. (hdc, sc) in next st. Sc in next 6 sts, (sc, hdc) in next st, (hdc, dc) in next st, (2 dc) in next st, (hdc, sc) in next st, sc in next 6 sts, (sc, hdc) in next st. (hdc, dc) in last st. Join to first st with sl st. (28 sts)
SIDES & TOP
Rnd 3:
Ch 2, hdc in next st and in each around. Join w/ sl st to ch2. (28 sts)
Rnd 4: CH 2, hdc in next 11 sts, dc2tog, dc3tog, dc2tog, hdc in next 9 sts, join. (24 sts)
Rnd 5: Ch 1,sc in same st, sc in next 10 sts. Hdc2tog, Dc2tog, hdc2tog, sc in next 5 sts, sc 2 tog, join to first sc w/ sl st.
Last 2 rows: Ch 1, sc in same st, sc in next 7 sts, ch 4, sk next 8 sts. sc in last 4 sts. Join, ch 1, sc in same st and in each st and ch around. Join.
Fasten off. Weave in all ends.
Designs by Abigail Goss of Crotiques

No-Bake Oreo Cheesecake...


Ingredient (18cm mould) :
Base:
  • 110g digestive biscuits crumbs
  • 40g melted butter
Filling:  (A)
  • 250g cream cheese
  • 45g milk
  • 50g icing sugar
  • 1 tbsp rum
  • 8 oreo cookies coarsely crushed
Filling:  (B)
  • 250ml whipping cream
Filling:  (C)
  • 1 tbsp gelatine powder
  • 10ml lemon juice
  • 3 tbsp hot water

Method:
  1. Toss biscuit crumbs into melted butter and press firmly on to base of cake pan. Chill in the fridge.
  2. Whip whipping cream till about 70% stiff or mousse state.
  3. Double boil (C) until gelatine powder dissolved. Keep warm.
  4. Cream (A) until smooth and creamy. Blend in gelatine solution.
  5. Blend in whipped cream.
  6. Pour 1/2 cheese mixture onto cake base top it with oreo cookies crushed coarsely and pour the rest of the cheese mixture on top. You can also stir in the crushed oreo cookies during Step (5). Chill for 3 hours.
  7. Decorate with some cream and finely crushed oreo.

Notes:
  1. You can add finely ground oreo into cheese mixture but the colour of the cake will then become dark grey instead of cream coloured.
  2. Better to do this cake on a pan with a removable base. I wrapped the cake pan base with aluminum foil and serve the cake on it.
  3. To easily remove chilled cake, wrap a warm towel around the pan and remove cake from the bottom.

Healthy Fruity Drink for Breakfast...

INGREDIENTS: 
1 cup strawberries, hulled 
1/3 cup frozen blueberries 
2 bananas, peeled and cut into chunks 
1/2 cup orange juice 
1 1/2 cups plain yoghurt 
1 tablespoon soy milk powder 

DIRECTIONS:
Combine strawberries, blueberries, bananas, orange juice, yogurt, and
soy milk powder in a blender. Blend until smooth, then pour into glasses and serve.

source:allrecipes.com

Open the Flood Gates of Heaven and Let it Rain....

Saturday 28 July 2012

Crocheted Beauty Set

CHOCOLATE MELTING MOMENTS

                                                                   
Ingredients:
  • 125 gm. Butter - softened
  • 2 Tbsp. icing sugar
  • 120 gm. plain flour
  • 2 Tbsp. Cornflour
  • 1 Tbsp. cocoa powder
  • 85 gm. Nutella spread

Method:

(1) Cream butter and icing sugar till light and fluffy.
(2) Add in dry ingredients an mix till a soft dough is formed.
(3) Spoon mixture into piping bag fitted with a star nozzle and pipe out onto a tray.
(4) Bake at 170C for about 15 mins. or till cooked. Cool on trays.
(5) Sandwich cookies with Nutella spread.

Heavenly Angel Pillows


By: Marilyn of Momsloveofcrochet

If you're looking for a beautiful free crochet angel pattern then look no further. This is a gorgeous heavenly angel pillow you will want in your living room during the holidays. Different thread size and hook sizes are provided depending on the size pillow you want.
Materials:
  • Crochet Thread Size 10 (makes 6 ½” x 7“); Size 20 (makes 5 ½” x 6”); Size 30 (makes 4 ½” x 5”)
  • Steel Crochet Hook Size 6 or 1.80 mm (Size 10 Thread); Size 8 or 1.50 mm (Size 20 thread); Size 10 or 1.30 mm (Size 30 Thread)
  • Sewing Needle and Thread
  • Purchased Pillow or you can make the pillow


Stitch Guide:
Dc Decrease-(uses next 2 dc)-*Yo, insert hook in next dc, yo and pull up a loop, yo and  draw through 2 loops on hook; repeat from * once more, yo and draw through all three  loops on hook (counts as one dc).
Sc Decrease-(uses next 2 dc)-Pull up a loop in each of next 2 sts, yo and draw through  all 3 loops on hook (counts as one sc)
Head and Bodice:
Ch 8.
Row 1: 2 dc in fourth ch from hook, dc in next 3 chs, 3 dc in last ch: 9 sts.
Row 2: (right side): Ch 3 (counts as first dc, now and throughout), turn; 2 dc in first dc, dc  in next 7 dc, 3 dc in last st: 13 dc.
Rows 3 and 4: Ch 3, turn; dc in next dc and in each dc across.
Row 5: Ch 2, turn; dc in next 10 dc, dc decrease: 11 dc.
Row 6: Ch 1, turn; sc decrease twice, sc in next 3 dc, sc decrease twice: 7 sc.
Rows 7 and 8: Ch 1, turn; sc in each sc across.
Row 9: Ch 3, turn; 2 dc in first sc, 3 dc in each sc across: 21 dc.
Row 10: Ch 3, turn; dc in same st, dc in next dc and in each dc across to last dc, 2 dc in  last dc: 23 dc.
Row 11: Ch 3, turn; dc in next 13 dc, place marker around last dc made for skirt  placement, dc in last 9 dc.
Row 12: Ch 1, turn; sc in first dc, (ch 3, sk next dc, sc in next dc) across to last 2 dc, ch 1,  sk next dc, hdc in last dc to form last ch-3 sp: 11 ch-3 sps.
Row 13: Ch 1, turn; sc in same sp, * ch 3, (dc, ch 1, tr, ch 1, dc) in next ch-3 sp, ch 3, sc  in next ch-3 sp; repeat from * across.
Row 14: Ch 1, turn; sc in first sc, * ch 5, sk next dc, (sc, ch 5, sc) in next tr, ch 5, sk next  dc, sc in next sc; repeat from * across: finish off.
Skirt:
Row 1: With right side facing, fold last 3 rows to front, join thread with sl st in marked dc;  ch 3, 4 dc in same st, 5 dc in each of next 2 unworked dc, leave remaining dc unworked: 15 dc.
Rows 2 and 3: Ch 4 (counts as first dc plus ch 1, now and throughout), turn; dc in next dc,  (ch 1, dc in next dc) across: 14 ch-1 sps.
Row 4: Ch 4, turn; dc in next ch-1 sp, ch 1, dc in next dc, ch 1, dc in next ch-1 sp, (ch 1,  dc in next dc) 11 times, (ch 1, dc in next ch-1 sp, ch 1, dc in next dc) twice: 19 dc.
Row 5: Ch 4, turn; dc in next dc, (ch 1, dc in next dc) across: 18 ch-1 sps.
Rows 6 - 9: Ch 5, (counts as first dc plus ch 2), turn; dc in next dc, (ch 2, dc in next dc)  across.
Row 10: Turn; sl st in first ch-2 sp, ch 1, sc in same sp, (ch 5, sc in next ch-2 sp) across to  last ch-2 sp, ch 2, dc in last ch-2 sp to form last ch-5 sp: 17 ch-5 sps.
Row 11: Ch 1, turn; sc in same sp, * ch 3, (dc, ch 3, tr, ch 3, dc) in next ch-5 sp, ch 3, sc  in next ch-5 sp; repeat from * across.
Row 12: Ch 1, turn; sc in first sc, * ch 3, sk next ch-3 sp, sc in next ch-3 sp, ch 3, dc in  next tr, ch 3, sc in next ch-3 sp, ch 3, sk next ch-3 sp, sc in next sc; repeat from * across.
Row 13: Ch 1, turn; sc in first sc, * ch 5, sk next 2 ch-3 sps, (sc, ch 5, sc) in next dc, ch 5,  sk next 2 ch-3 sps, sc in next sc; repeat from * across; finish off.
Wings:
Ch 16; join with sl st to form a ring.
Row 1: Ch 4, (counts as first tr), 24 tr in ring; do not join. 25 tr.
Row 2: (right side): Ch 5 (counts as first tr plus ch 1, now and throughout), turn; (tr in next  tr, ch 1) 10 times, (tr, ch 4, sc) in next tr, ch 4, sc in next tr, ch 4, (sc, ch 4 tr) in next tr, (ch  1, tr in next tr) across.
Row 3: Ch 6 (counts as first tr plus ch 2, now and throughout), turn; (tr in next tr, ch 2) 10  times, (tr, ch 4, sc) in next tr, ch 4, sc in next sc, ch 9, sk next sc, sc in next sc, ch 4, (sc,  ch 4, tr) in next tr, (ch 2, tr in next tr) across.
Row 4: Ch 6, turn; (tr in next tr, ch 2) 10 times, (tr, ch 4, sc) in next tr, ch 4, (sc in next sc,  ch 4) twice, working around ch-9 sp, sc in next sc one row below, ch 4, (sc in next sc, ch  4) twice, (sc, ch 4, tr) in next tr, (ch 2, tr in next tr) across; do not finish off.
First Edging:
Row 1: Ch 1, turn; sc in first tr, (ch 5, sc in next tr) 10 times, ch 2, dc in next tr to form last  ch-5 sp, sk next 8 sps, place marker around net tr for second edging placement, leave  remaining sts unworked: 11 ch-5 sps.
Rows 2-4: Work same as skirt rows 11 - 13.
Second Edging:
Row 1: With wrong side facing, join thread with sl st in marked tr; ch 1, sc in same st, (ch  5, sc in next tr) 10 times, ch 2, dc in last tr to form last ch-5 sp: 11 ch-5 sps.
Rows 2-4: Work same as skirt rows 11 - 13.
Sew wings to back of angel.  Sew angel to pillow.

What an Awesome God we serve!!!

Friday 27 July 2012

Thank God for a New Day!

Chicken Croquettes

Prep Time: 25 min Total Time: 37 min Makes: Makes about 15

What You Need:
  • 1/2 cup chopped onion
  • 1/4 cup chopped green pepper
  • 1/4 tsp. crushed red pepper
  • 2 cups shredded cooked chicken
  • 1/2 cup KRAFT Shredded Monterey Jack Cheese
  • 2 cups prepared mashed potatoes 1 egg, lightly beaten
  • 25 RITZ Crackers, crushed (about 1/2 cup)
  • 2 cups oil
Make It:
  1. SPRAY small skillet with cooking spray. Add onion, green pepper and crushed red pepper; cook and stir on medium-high heat 10 min. or until onion is tender. Set aside.
  2. MIX chicken, cheese and potatoes in large bowl. Add onion mixture; mix well. Cool completely. Divide into 15 equal portions, then shape each portion into 3-inch sausage-shaped croquette. Dip croquettes in egg, then in cracker crumbs, turning to evenly coat both sides.
  3. POUR oil into large saucepan. Heat to 375°F. Add croquettes, in batches; cook 3 min. on each side or until golden brown on both sides. Remove croquettes from pan; drain on paper towels. Serve warm.
  4. Kraft Kitchens Tips Cooking Know-How
  5. Using cold, leftover mashed potatoes makes it easier to shape the croquettes.
  6. Fun Idea To serve as appetizers,
  7. prepare as directed except shape the meat mixture into smaller croquette shapes before frying.                                                       source:kraftfoods.com

Newborn Layette


Materials:
1 oz soft 4 ply worsted weight yarn.
Size I hook

Make the BAND (brim) first:
Directions:
Ch 5
Row 1: Sc in the 2nd ch from the hook and in the next 3 sts. Ch 1 and turn.
Row 2: Sc in 2nd sc from hook (back Loops only throughout). Sc in each sc across, ch 1 and turn
Repeat Row 2 until band measures 10.5" - 11" . 

Next you will be doing the TOP of the hat:
Now you will form the TOP of the hat, working in rounds:
Fold band in half and sl st shut. Ch 1 and work around edge of band ~ sc 37 evenly around band, join with sl st into top of first sc. (back loops only) Chain 3
Rnd 1: Dc in 2nd ch from hook and in each st around. 36 sts Join with sl st into top of 1st st, ch 3, turn
Row 2-5: Repeat Row 1 until the hat measures about 3.5" - 4" from the beginning.

Decreasing for top:
Row 1: *Dc in 2 sts, Dc 2 sts together (go through backs of sts); repeat from * around. Ch 1 and join.
Rows 2 and other even rows: Dc in each Dc around; ch 1 and join.
Row 3: *Dc in 2 sts, Dc 2 sts together; rep from * around. Ch 1 and join.
Row 5: *Dc in 1 st, Dc 2 sts together; rep from * around. Ch 1 and join.
Row 7: Dc across and finish off. Leaving a 12" tail to gather top and sew side seam.

For a creative BAND - add a row of shell stitch. Roll up the brim/band, and add yarn again. Into the first stitch dc 5 sts. skip 2 sts and dc 5 more into the next st. Continue around. Or you can be creative. I like to make a loopy edge by sc into the first stitch of the brim, ch 5, sk 1 st and sc into next. Continue around.

(Hat can be made smaller for tinier babies, simply by using baby yarn, or a smaller hook.)

BOOTIES :

1 oz baby yarn, sport yarn or soft worsted weight like Caron Simply Soft.
H or I Hook.
Finished size of sole is approx 3.5", height of bootie from heel to top of cuff = 3" (Cuff can be rolled over)

Note: The entire piece is worked round and round from the right side. Be sure the counts are correct for each round and work to keep the heel back seam straight.

Rnd 1: Chain 9. 2 sc in second ch from hook, sc in each of next 5 chs, hdc in next ch, 5 hdc in end ch. Now working down the other side of chain, hdc in next ch, sc in each of next 5 chs, 2 sc in next ch. Join with a sl st. 
Rnd 2: Ch 1, 2 sc in same st as join, sc in each of next 9 sts, 2 sc in each of next 3 sts, sc in each of next 8 sts, 2 sc in next st. Join with a sl st.
Rnd 3: Ch 1. Sc in back loop of joining stitch and in the back loop of every stitch around. Join. (27 stitches)
Rnd 4: Ch 1, sc in same st as join, then sc in each stitch around.
Rnd 5: Ch 1. Sc in same st as join, sc in each of next 10 sts, sc decrease over next 2 sts, then repeat the dec 2 more times, sc in each of next 10 sts. Join. 
Rnd 6: Ch 1. Sc in same st as join, sc in each of next 9 sts, sc decrease over next 2 sts, then repeat the dec 2 more times, sc in each of next 9 sts. Join. 
Rnd 7: Ch 1. Sc in same st as join, sc in each of next 8 sts, sc decrease over next 2 sts, then repeat the dec 2 more times, sc in each of next 8 sts. Join.
Rnd 8: Ch 1. Sc in same st as join, sc in each of next 7 sts, sc decrease over next 2 sts, then repeat the dec 2 more times, sc in each of next 7 sts . Join. 
Rnd 9: Ch 1. Sc in same st as join, sc in each of next 6 sts, sc decrease over next 2 sts, then repeat the dec 2 more times, sc in each of next 6 sts . Join. 

CUFF: Ch 2 (counts as first hdc here and throughout). Hdc in same st as join, hdc in next st and each st around. Join. Repeat this row 2 more times (3 rows hdc) (Final row should be 17 hdc). 
Final round of cuff do front post and back post alternating in HDC. Fasten off. Weave in end. 


Materials:
H hook Newborn size or large preemie in (parenthesis)
2 oz Caron's Simply Soft Yarn or Lion Brand's Pound of Love Yarn 4 ~ 1/2" buttons.
DC= Double Crochet st= stitch ch= chain sp = space sc = Single crochet

MEASUREMENTS using 1 strand: Measurements: From Shoulder at neck- to the cuff of the sleeve = 8.25"
From top neck down to the front = 8.5" in length.
Across back measured just under the arms = 8.5"
All the way around under the arms = 17"*Shell or V: (dc, ch1, dc) in indicated stitch.
JACKET: Starting at the top/neck
Chain 48 (fits 8-10 lber) (44 chs for large preemie or small newborn)
Row 1: DC in 2nd ch from hook (counts as first dc now and throughout) and in the next 6 (5) sts. Make a *shell (dc, ch1, dc) in next st, dc in next 9 (8) sts, shell in next st, dc in next 12 st, shell in next st, dc in next 9 sts (8 st), shell in next st, dc in last 7 sts (6 st). Ch 2, turn.
Rows 2-6: (do 5 rows for preemie size) DC in the 2nd st from the hook. Dc to ch-1 sp, make shell in ch-1 sp, Dc across to next ch-1 sp, shell in ch-1 sp, dc across to next ch-1 sp, shell in ch-1 sp, dc across to next ch-1 sp, make shell in ch-1 sp, dc in remaining last space. Ch 2, turn. (Be sure you start in that 2nd chain from the hook and finish at the very end each row!)

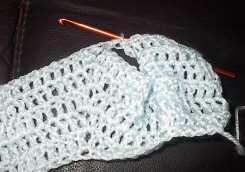
                                                                                               Row 7: (6) Dc to first ch-1 sp, fold garment in thirds and connect first and second ch-1 spaces (the holes) with a dc. Dc across to next ch-1 sp, fold shirt in thirds again, connect 3rd and 4th ch-1 spaces by making a DC in the 4th ch-1 space. Dc across to end.
Rows 8-14: (7-13) Ch 2, turn. DC in each DC across.
At the end of Row 12, ch 1 and turn.
(You can make it more fun by changing colors on a few rows)

Edge of sweater: Sc around the entire jacket, making 3 sc in each corner st. (on the sides just crochet the sc in a 'hole' along the edge there.) Join with a sl st to the first sc you made. Cut yarn 4" long and weave that back inside the jacket.
Sleeves: Attach yarn at the arm pit. Ch 2 to make the first dc. Dc around the armhole with 24 dcs. Join in the top of the initial ch 2 and dc around. Do this for a total of 7 rounds.
Rnd 8: Do a front post st in next dc, then a back post st in the next dc, and repeat these 2 sts around for cuff.
End off.

Make chains of 25 sts for the ties. Place tie them with 3 or 4 knots at top or down the front in 3 or 4 places for added warmth. Leave about 3" of yarn to weave inside the jacket back and forth to secure.

Praying Hands Shawl


Cast on 63 sts
Row 1-30: K3 P3 pattern for 30 rows. 
DO NOT FASTEN OFF, continue with Praying Hands Pattern Block pattern as written.

Praying Hands Washcloth pattern © Knitwits Heaven, By: Allison Barrett & Lisa Vienneau
Completed Shawl
BEGIN Praying Hands block, beginning right side…mark right side;
Row 1-3: k3, p3, k2, place marker, (p1, k1 for 47 sts,) place marker, k2, p3, k3, turn
Row 4: k3, p3, k2, p47, k2, p3, k3 turn
Row 5: k3, p3, k2, p1, k1, p1, k41, p1, k1, p1, k2, p3, k3, turn
Row 6: k3, p3, k2, p1, k1, p16, k3, p8, k2, p14, k1, p1, k2, p3, k3, turn
Row 7: k3, p3, k2, p1, k1, p1, k12, p4, k5, p6, k14, p1, k1, p1, k2, p3, k3, turn
Row 8: k3, p3, k2, p1, k1, p15, k1, p4, k2, p4, k1, p2, k3, p11, k1, p1, k2, p3, k3, turn
Row 9: k3, p3, k2, p1, k1, p1, k8, p3, k3, p2, k2, p3, k3, p4, k13, p1, k1, p1, k2, p3, k3, turn
Row 10: k3, p3, k2, p1, k1, p12, k2, p4, k2, p3, k2, p2, k2, p4, k2, p8, k1, p1, k2, p3, k2, turn.
Row 11: k3, p3, k2, p1, k1, p1, k6, p2, k4, p2, k2, p2, k3, p2, k6, p2, k10, p1, k1, p1, k2, p3, k3, turn
Row 12: k3, p3, k2, p1, k1, p10, k2, p8, k2, p3, k2, p2, k2, p4, k2, p6, k1, p1, k2, p3, k3, turn
Row 13: k3, p3, k2, p1, k1, p1, (k4, p2) 2x, k2, p2, k4, p1, k10, p1, k9, p1, k1, p1, k2, p3, k3, turn
Row 14: k3, p3, k2, p1, k1, p10, k1, p3, k3, p1, k4, p5, k2, p2, (k2, p4) 2x, k1, p1, k2, p3, k3, turn
Row 15: k3, p3, k2, p1, (k4, p2) 2x, k3, p1, k5, (p3, k1) 2x, p2, k1, p2, k9, p1, k1, p1, k2, p3, k3, turn
Row 16: k3, p3, k2, p1, k1, p11, k3, p8, k1, p2, k2, p1, k2, p2, k2, p1, k1, p3, k2, p2, k1, p1, k2, p3, k3, turn
Row 17: k3, p3, k2, p1, k2, p2, k3, p2, k4, p2, k3, p2, k10, p3, k10, p1, k1, p1, k2, p3, k3, turn
Row 18: k3, p3, k2, p1, k1, p12, k1, p10, k2, p5, k1, p4, k2, p4, k1, p1, k1, p1, k2, p3, k3, turn
Row 19: k3, p3, k2, p1, k2, p1, k3, p2, k4, p2, k6, p3, k5, p4, k11, p1, k1, p1, k2, p3, k3, turn
Row 20: k3, p3, k2, p1, k1, p11, k4, p4, k4, p8, k2, p4, k5, p1, k1, p1, k2, p3, k3, turn
Row 21: k3, p3, k2, p1, k3, p2, k5, p2, k11, p3, k6, p2, k9, p1, k1, p1, k2, p3, k3, turn
Row 22: k3, p3, k2, p1, k1, p9, k2, p6, k2, p14, k2, p4, k2, p2, k1, p1, k2, p3, k3, turn
Row 23: k3, p3, k2, p1, k4, p6, k16, p2, k5, p2, k8, p1, k1, p1, k2, p3, k3, turn
Row 24: k3, p3, k2, p1, k1, p8, k2, p6, k2, p17, k3, p5, k1, p1, k2, p3, k3, turn
Row 25: k3, p3, k2, p1, k1, p1, k8, p2, k15, p1, k7, p2, k6, p1, k1, p1, k2, p3, k3, turn
Row 26: k3, p3, k2, p1, k1, p6, k2, p7, k2, p14, k2, p10, k1, p1, k2, p3, k3, turn
Row 27: k3, p3, k2, p1, k1, p1, k9, p2, k14, p2, k7, p2, k5, p1, k1, p1, k2, p3, k3, turn
Row 28: k3, p3, k2, p1, k1, p5, k2, p7, k2, p15, k2, p10, k1, p1, k2, p3, k3, turn
Row 29: k3, p3, k2, p1, k1, p1, k9, p2, k15, p2, k7, p2, k4, p1, k1, p1, k2, p3, k3, turn
Row 30: k3, p3, k2, p1, k1, p4, k2, p7, k2, p16, k2, p10, k1, p1, k2, p3, k3, turn
Row 31: k3, p3, k2, p1, k1, p1, k9, p2, k16, p2, k8, p1, k3, p1, k1, p1, k2, p3, k3, turn
Row 32: k3, p3, k2, p1, k1, p3, k2, p7, k1, p17, k2, p11, k1, p1, k2, p3, k3, turn
Row 33: k3, p3, k2, p1, k1, p1, k10, p2, k17, p2, k6, p2, k4, p1, k2, p3, k3, turn
Row 34: k3, p3, k2, p1, k1, p2, k2, p7, k2, p17, k2, p11, k1, p1, k2, p3, k3, turn
Row 35: k3, p3, k2, p1, k1, p1, k10, p2, k18, p1, k5, p1, k1, p2, k3, p1, k2, p3, k3, turn
Row 36: k3, p3, k2, p1, k1, p1, k2, p2, k2, p4, k1, p18, k2, p11, k1, p1, k2, p3, k3, turn
Row 37: k3, p3, k2, p1, k1, p1, k11, p2, k17, p1, k4, p2, k2, p2, k2, p1, k2, p3, k3, turn
Row 38: k3, p3, k2, p1, k1, p1, k2, p2, k2, p3, k2, p17, k2, p12, k1, p1, k2, p3, k3, turn
Row 39: k3, p3, k2, p1, k1, p1, k11, p2, k13, p1, k3, p2, k4, p2, k1, p2, k2, p1, k2, p3, k3, turn
Row 40: k3, p3, k2, p1, k1, p1, k2, p1, k1, p5, k1, p3, k2, p12, k2, p13, k1, p1, k2, p3, k3, turn
Row 41: k3, p3, k2, p1, k1, p1, k12, p2, k9, (p1, k3) 2x, p2, k4, p1, k1, p2, k2, p1, k2, p3, k3, turn
Row 42: k3, p3, k2, p1, k1, p1, k2, p1, k1, p4, k1, p3, k2, p2, k2, p9, k2, p13, k1, p1, k2, p3, k3, turn
Row 43: k3, p3, k2, p1, k1, p1, k12, p2, k3, p2, k1, p1, k3, p1, k2, p2, k3, p2, k2, p2, k1, p2, k2, p1, k2, p3, k3, turn
Row 44: k3, p3, k2, p1, k1, p1, k2, p1, k2, p2, k1, p3, (k2, p2) 2x, k2, p1, k2, p3, k2, p13, k1, p1, k2, p3, k3, turn
Row 45: k3, p3, k2, p1, k1, p1, k13, p2, k3, p2, k1, p1, k3, p1, k2, p2, k3, p2, k1, p1, k2, p2, k2, p1, k2, p3, k3, turn
Row 46: k3, p3, k2, p1, k1, p1, k2, p4, k1, p3, (k2, p2) 2x, k2, p1, k1, p4, k2, p14, k1, p1, k2, p3, k3, turn
Row 47: k3, p3, k2, p1, k1, p1, k13, p2, k4, p2, k1, (p1, k3) 3x, p2, k3, p2, k2, p1, k2, p3, k3, turn
Row 48: k3, p3, k2, p1, k1, p1, k2, p3, k1, p3, (k2, p2) 2x, k2, p1, k2, p3, k2, p15, k1, p1, k2, p3, k3, turn
Row 49: k3, p3, k2, p1, k1, p1, k15, p2, k1, p3, (k2, p2) 2x, k2, p1, k3, (p2, k2) 2x, p1, k2, p3, k3, turn
Row 50: k3, p3, k2, p1, k1, p2, k1, p2, k2, p2, k2, p2, k1, p3, k1, p2, k2, p1, k3, p17, k1, p1, k2, p3, k3, turn
Row 51: k3, p3, k2, p1, k1, p1, k21, p1, (k2, p2) 2x, k2, p1, k2, p2, k1, p2, k3, p1, k2, p3, k3, turn
Row 52: k3, p3, k2, p1, k1, p2, k2, (p1, k2) 3x, (p2, k2) 2x, p22, k1, p1, k2, p3, k3, turn
Row 53: k3, p3, k2, p1, k1, p1, k22, (p2, k2) 2x, p1, k2, p3, k2, p1, k4, p1, k2, p3, k3, turn
Row 54: k3, p3, k2, p1, k1, p3, k1, (p2, k2) 2x, p1, k2, p2, k2, p24, k1, p1, k2, p3, k3, turn
Row 55: k3, p3, k2, p1, k1, p1, k24, p2, k2, (p2, k1) 3x, p2, k2, p1, k1, p1, k2, p3, k3, turn
Row 56: k3, p3, k2, p1, k1, p3, (k2, p1) 4x, k2, p26, k1, p1, k2, p3, k3, turn
Row 57: k3, p3, k2, p1, k1, p1, k26, (p2, k1) 2x, p3, k2, p1, k3, p1, k1, p1, k2, p3, k3, turn
Row 58: k3, p3, k2, p1, k1, p4, k1, p2, k1, p3, k4, p28, k1, p1, k2, p3, k3, turn
Row 59: k3, p3, k2, p1, k1, p1, k28, p5, k1, p1, k1, p2, k3, p1, k1, p1, k2, p3, k3, turn
Row 60: k3, p3, k2, p1, k1, p7, k4, p32, k1, p1, k2, p3, k3, turn
Row 61: k3, p3, k2, p1, k1, p1, k41, p1, k1, p1, k2, p3, k3, turn
Row 62: k3, p3, k2, p1, k1, p43, k1, p1, k2, p3, k3, turn
Row 63-66: k3, p3, k2, (p1, k1 for 47 sts) k2, p3, k3, turn
Remaining Rows: K3 P3 to end of row, turn, continue with this pattern until shawl measures 65"- 70". bind off.

Something to shout about!

Pastor Chris Oyakhilome

Thursday 26 July 2012

The Power of a Hug...


I think the power of a hug these days is way underestimated.

I believe a hug can heal hearts, soothe away pains, and infuse a sweet feeling of love like nothing else. Granted, I come from an extremely large family that is very "touchy-feely" as some might say, and grew up thinking that hugging everyone, especially the people you loved, was not only the normal thing to do, but crucial in letting people you know you cared about them.

Maybe that is why hugs are so important to me now, even as an adult. In fact, I have spent the last sixteen years devoted to passing the hug tradition down to my own children, and although sometimes they may get a little bit tired of moms hugging obsession, deep down, I know it makes them feel loved and valued.

You see, I dont believe that hugs are simply a form of affection, but instead, an outward symbol of the deep love that someone holds for you in their heart. And I think that for most women, there is no bigger need in our hearts than to receive those special hugs from the people we love, especially from our husbands.

I can always tell when I am feeling a little empty inside, and hug-needy. I can recognize within myself when I begin to feel discouraged, a little joy-less, even feeling a little unloved, and unnoticed. Maybe it is not because of anything that has happened, but simply because of a lack of hugs. Similar to the aching hunger we feel when we are without food for long periods of time, our hearts can ache too for the affection that God created us to desire.

I know that women need more affection than men, and as a result, many men just do not realize how powerful a hug can be. How one sweet, tight hug - full of genuine love and intended for no other reason except to wrap their arms around the person they love - can boost a womans heart so much, that her joy returns, and things seem all better again.

But Jesus knows the power of a hug, and His love for us runs too deep to measure.

Today someone sent me a photo in email, of a hug. Not just any ol' hug, but a Jesus hug.


As I stared at this picture, at this girl held so tightly by her Heavenly Father, I found myself longing for such a hug. In fact, kind of aching for such a hug. I sensed a feeling of discouragement come over me, simply because I so desperately wished deep in my heart that Jesus could hug me like that, with His arms wrapped tightly around my waist as I melted into His chest, my head nestled under his bearded chin, and feeling more secure, loved, adored, and safer than ever before. But when I looked at this picture, in my heart, I began to feel the power of a spiritual hug.

I think we all have those days when we just really could use a hug. A hug that makes us feel loved, appreciated, noticed and valued. A hug that soothes away the hurt, and fills us with joy that warms our heart. I think I got this email today, because God knew I needed a spiritual hug. I needed to be reminded that He is holding me just as tightly, and that His hugs are readily available through the Holy Spirit every day.

Maybe we cannot physically feel His strong arms wrapped around us, but we can feel His love and presence wrapped around our hearts. We can feel the power of the Holy Spirit residing in our hearts. We can choose to believe that Jesus knows when we need a hug, and those are the times that He will be there with open arms.

Jesus knows when my heart is longing for reassurance and comfort, and He offers me comfort through the pages of His Word. He knows when I need a friend to lean on, and He pricks someones heart to call me out of the blue and ask me out to lunch. He knows when I am struggling with problems in my life, and He arranges for a special "irony" to occur to remind me that He is aware, and at work.

He knows when my heart is sad, and then one of my children will feel led to just spontaneously give me a big long hug. Now, that is a hug from Jesus.

Our Daddy knows when we need a hug, and He is always willing to give us one - maybe through His Word, maybe through a circumstance, maybe through a friend, maybe through a child, or maybe through the arms of a husband.

He knows our needs, but sometimes it helps to talk them over with Him. Sometimes these spiritual hugs are blessed upon us without request, but sometimes we need to ask to receive.

Do you need a hug today? Just ask Jesus for one. Other than our husband, Jesus is the single most important man in our life, and His hugs matter too.

DIY Chalkboard Party Cart...

By: Krylon

Upcycle a tired piece of furniture into a stylish chalkboard party cart with DIY furniture painting. Using chalkboard paint from Krylon, you can turn your cart into a conversation piece for your next party.


Materials:
  • Party cart or side table
  • (1) can Krylon Indoor/Outdoor Primer
  • (1) can Krylon Indoor/Outdoor White spray paint
  • (1) can Krylon Dover White spray paint
  • (1) can Krylon Chalkboard spray paint
  • Purdy 6 in 1 Painters Tool
  • Gorilla Glue
  • Wood Putty
  • DecoArt Americana Acrylic in Dove Gray
  • DecoArt Glazing Medium
  • Screwdriver
  • Sand Paper
  • Paper plate or something for mixing paint
  • Paint brush
  • Drop cloth or newspaper to protect work area
Instructions:
  1. Clean cart. I used the Purdy 6 in 1 Painters Tool to scrape off the stickers and gunk.
  2. Repair cart: The cart was more abused that I realized – one leg was held together by screws. I removed the screws, and glued the leg together with Gorilla Glue. Let dry.
  3. Once the glue was dry, I realized there were still some cracks, so I added some wood putty to fill those in. Let dry. Sand.
  4. I sprayed a coat of Krylon Primer and then more blemishes in this beauty of a cart appeared…more Gorilla Glue…more wood putty…more sanding…ta-da!
  5. I sprayed a second coat and let dry. NOTE: I had decided that my top was going to be chalkboard so I took no care to paint the top nicely with the Krylon. I did prime it with the Krylon Primer.
  6. I LOVE Kylon’s Dover White (I have used it on many projects), so I continued to paint the cart with it and the colour was spot on and application super-duper easy.
  7. After drying I knew what had to be done…distress it. The cart was begging for it – it was the only way to save the cart and camouflage the damage. So on this gorgeous base of paint, I sanded the legs and a few other areas to show the wear – I especially hit the places where the damage was already done.
  8. Then I glazed the entire cart with a mixture of DecoArt’s Dove Gray American Acrylic and Glazing Medium. I just mixed the two together and used a rag to wipe on and wipe off. It gave a subtle glazed, while letting the original colour shine through.
  9. Once the glaze was dry, I sprayed the entire cart with the Deft Clear Wood Finish Sealer from Rockler. I sprayed now – before painting my top with the chalkboard paint because I did not want the chalkboard to be “sealed” – it was just easier.
  10. Once the sealer is dry, paint the top with chalkboard paint – 2 coats according to bottle directions. Let dry. Prime and get writing!

Crochet Rain Boots for rainy days!!!

By: Sarah Zimmerman


'
Crochet Rain Boots
Size: 6-12 months

Supplies:

  • Vanna's Choice® medium worsted weight yarn
  • Crochet hook size H-8 (5.0 mm)
  • tapestry needle for weaving in ends
Abbreviations:
ch - chain
sc - single crochet
sc dec – single crochet decrease (I used the invisible decrease)

Round 1: ch 11, sc in 2nd chain from hook, sc 8, sc 5 in last chain.
Round 2: Now working on opposite side, sc 9, join, ch 2.
Round 3: hdc in same st, 2 hdc in next 2, hdc in next 6, 2 hdc in next 6, hdc in next 6, 2 hdc in next 2, Join to ch 2, ch 1.
Round 4: sc in next 14, 2 hdc in next 6, sc in next 14, Join to first sc, ch 1.
Round 5: In back loops only, sc 1 in next stitch, sc around. Join to first sc, ch 1. (40 sc)
Round 6: In back loops only, sc in same st, sc around. Join to first sc, ch 1. (40 sc)
Round 7 and 8: Working in both loops from now on, sc in same st, sc around. Join to 1st sc.
Round 9: sc in same stitch, sc 11, sc dec, sc in next 2, sc dec, sc in next 2, sc dec, sc in next 2, sc dec, sc in next 2, sc 12. Join, ch 1.

Note: For the rest of the pattern you should begin your rounds by sc in same stitch (like you’ve been doing since round 6) and count it as your first sc.

Round 10: sc 14, sc dec, sc, sc dec, sc, sc dec, sc 14, join, ch 1.
Round 11: sc 10, 6 sc decreases, sc 11, join, ch 1.
Round 12: sc 10, 3 sc decreases, sc 11, join, ch 1.
Round 13: sc 8, 4 sc decreases, sc 8, join, ch 1.
Round 14-17: sc 20, join, chain 1. at the end of round 17, change colour.
Round 18: sc 20 in new color, join, chain 1.
Round 19: sc 3, ch 8, skip 5 stitches, sc 5, ch 8, skip 5 stitches, sc 2, join, ch 1.
Round 20: sc 3, sc 10 in 5 chain space, sc 4, sc 10 in 5 chain space, sc 1, join to first sc, ch 1.
Round 21: sc around, join, fasten off and weave in loose ends.

Optional: With the same colour you used for the top of the boot, slip stitch around the bottom of the boot. I did this along the first “rim” that was created from crocheting in the back loops.


Yummilicous Cheesecake Brownies

                                                             
 These brownies are dense with great chocolate flavor just the way we likes it.

Ingredients :
  • 1/2 cup (1 stick) butter
  • 2 oz of unsweetened baking chocolate (I used 4 oz)
  • 1 1/4 cup of sugar (I used only 1 cup)
  • 2 eggs
  • 1 cup of flour
  • 1 tsp of vanilla
  • 1/2 tsp of baking powder
  • 1/4 tsp of salt
For the topping :
  • 1 (8 oz) low fat cream cheese
  • 1 egg
  • 1/3 cup of sugar
Directions :
  1. Heat oven to 350°F. Grease bottom only of 8 x 8 inch square baking pan. Set aside.
  2. Melt butter and chocolate in a saucepan over low heat, stirring occasionally, until smooth (4 to 7 minutes). Remove from heat.
  3. Stir in sugar and vanilla. Add eggs, one at a time, mixing well after each addition. Add flour, baking powder and salt; mix just until all ingredients are moistened and brownie mixture is smooth.
  4. Spread brownie mixture into prepared baking pan.
  5. For the topping beat the cheese, egg and sugar until smooth. Dollop the cream cheese mixture on top of the brownie batter. Swirl together using a knife or skewer.
  6. Bake for 25 to 33 minutes or until brownies just begin to pull away from sides of pan. Cool completely and then cut into bars and serve.
http://www.mykitchensnippets.com